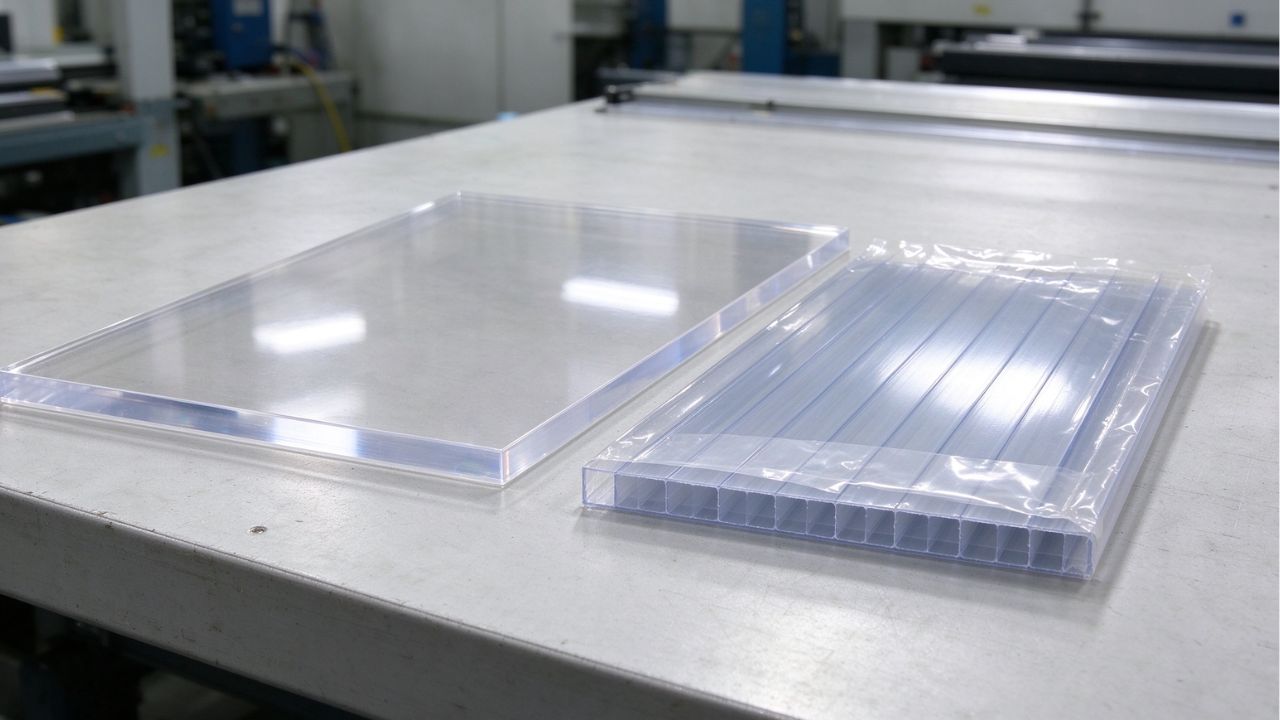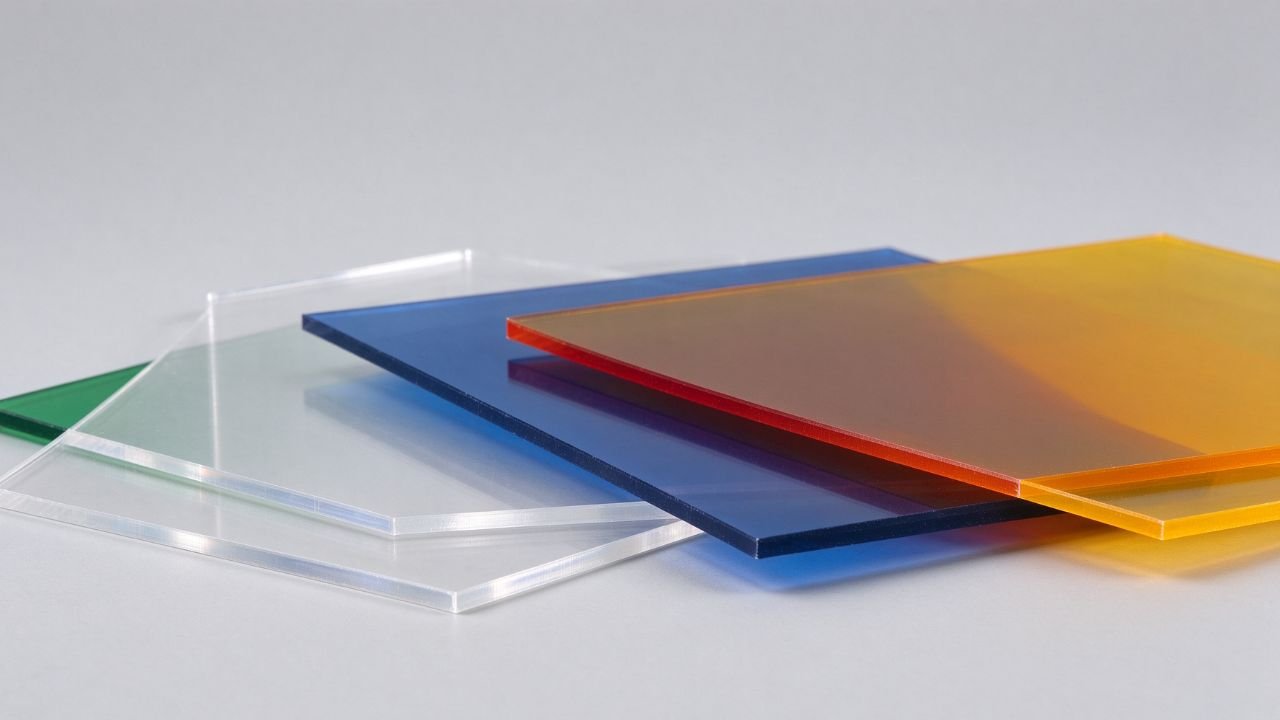
Most plastics naturally have low surface energy. Unlike wood or paper, plastic is non-porous. So, how can you print on plastic without the ink smudging, peeling, or scratching off? Here is our breakdown of common plastic materials, primary printing techniques, and how to pick the right setup for your projects.
Printable Plastic Materials
Rigid Plastics Substrates
These materials are rigid and flat, making them ideal for your marking and display needs. In commercial production, we print them with industrial UV flatbed systems or heavy-duty screen printing presses.
PVC/Polyvinyl Chloride
PVC is the industry workhorse for cost-sensitive commercial printing. Its high natural surface tension accepts UV flatbed and screen inks directly—no pre-treatment required. With a high natural surface hardness, it exhibits excellent ink adhesion when printed with UV flatbed ink or screen printing inks without any complex surface treatment.
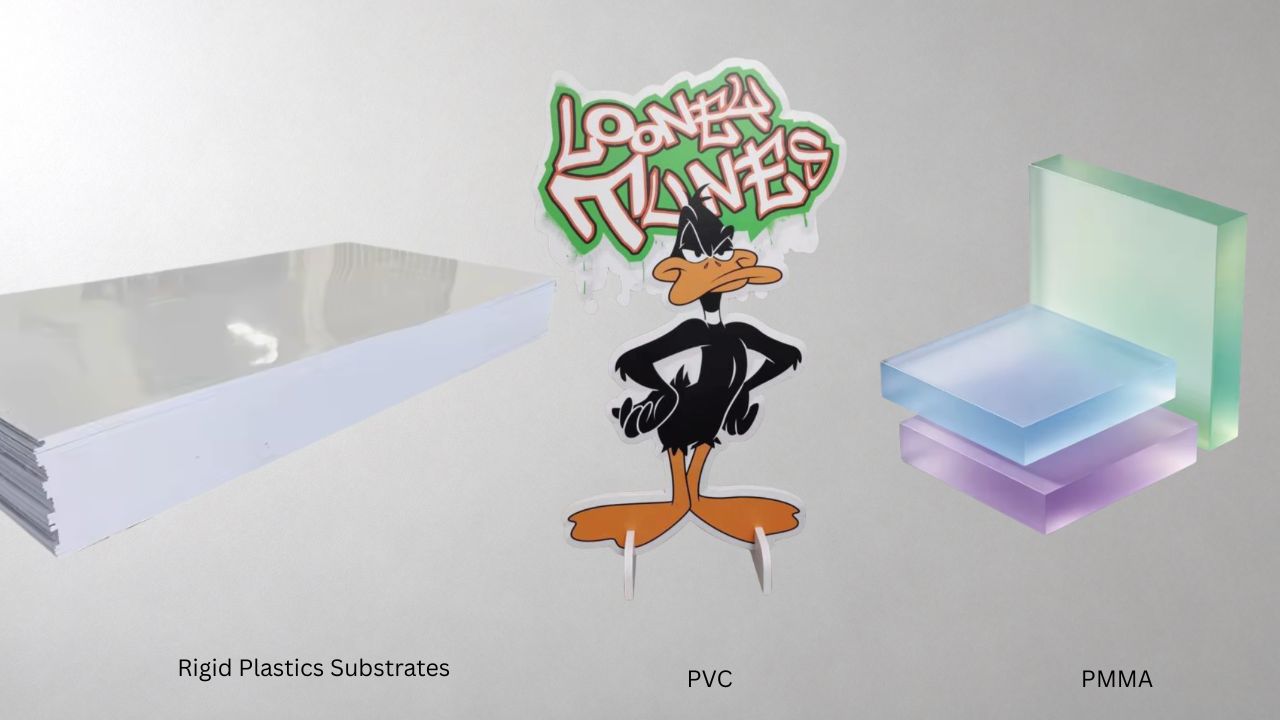
Whether you choose dense hard PVC board or lightweight PVC foam board (such as Forex), they achieve color density values >1.8 D and crisp 6-pt font legibility without ink bleeding. In actual applications, rigid PVC is suitable for making high-density cards or thin sheets, while PVC foam boards are both lightweight and structurally rigid.
Thanks to its flame retardancy, weather resistance and great cost-effectiveness, PVC remains our go-to material for retail POP display stands, directional signs and indoor advertisements.
Acrylic / PMMA (Polymethyl Methacrylate)
If your printing project requires high transparency or visual depth, then Acrylic / PMMA is your first choice. Acrylic is well known for its transparency similar to that of glass, and we often use it to print partially transparent designs for products like display stands. It supports direct UV printing and traditional screen printing methods.
In the industry, we often adopt the second-surface printing process—it involves printing patterns on the back of transparent acrylic sheets. The sheet becomes a protective barrier for the ink layer itself, safeguarding it from scratches. On the front, it also presents a full and crystal-clear 3D visual effect.
This unique printing effect makes acrylic widely used. In addition to display stands, you can also frequently find it in high-end commercial signs, architectural wayfinding signage, and decorative wall art.
PC / Polycarbonate
PC features exceptional impact strength, high-temperature resistance, and dimensional stability, making it ideal for screen printing and specialized UV inks. In practical applications, we often adopt the second-surface printing process to protect your patterns from physical scratches and chemical corrosion.
It is the core material for industrial equipment control panels, membrane switches, and automotive instrument panels. Due to the high material cost, we only recommend it for projects that have clear requirements for explosion-proof performance and heavy impact resistance.
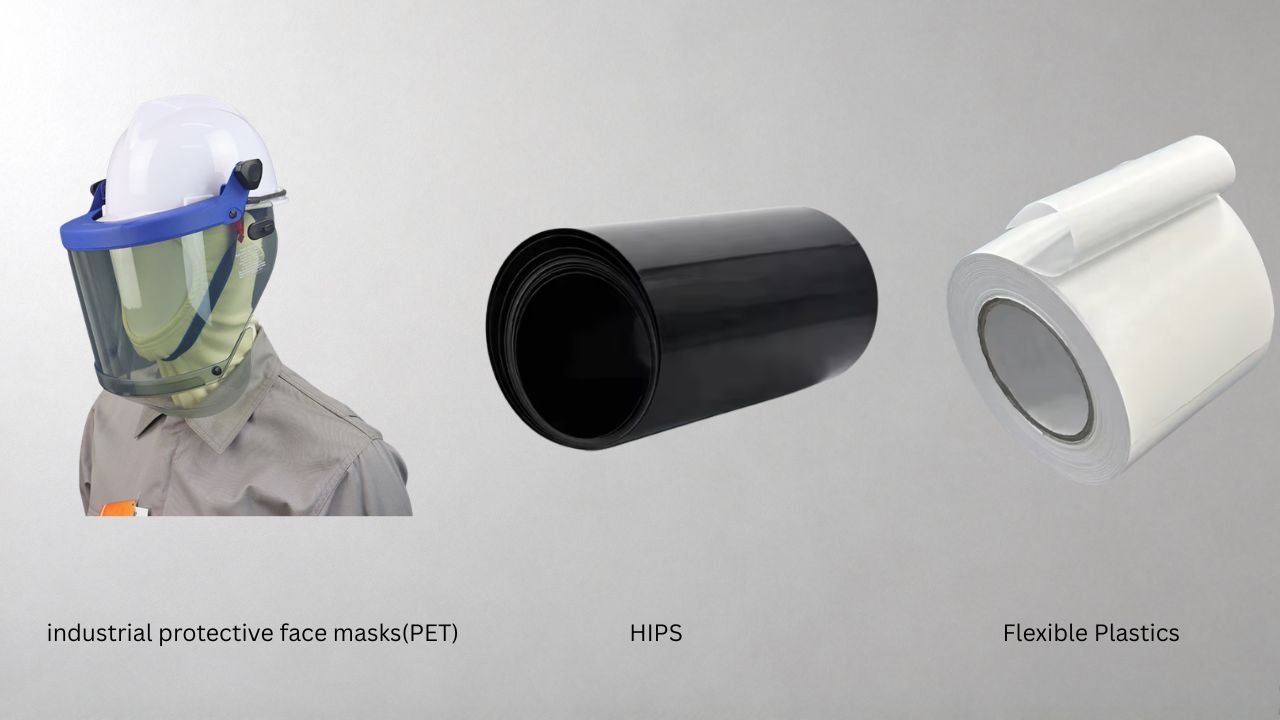
PET/PETG
PET and PETG combine high clarity with shatter resistance. For thermoforming, die-cutting, or hot-bending, PETG keeps printed ink layers intact without cracking or flaking at stress points.
Their greatest technical advantage lies in the secondary processing performance after printing, especially for PETG. When undergoing thermoforming, hot bending, or die-cutting, the ink layer adhering to the surface resists cracking. For your transparent folding boxes, blister packaging, and industrial protective face masks, they are widely specified materials.
HIPS
Specially designed for your large-scale commercial printing projects, HIPS is a thermoplastic sheet with a smooth surface and light weight.
It is compatible with digital flatbed ink and screen printing inks, offering fast ink curing with simple surface preparation. Its excellent dimensional stability enables it to be easily cut and vacuum-formed after printing, working for large-scale promotional signs, indoor POP displays, and restaurant light boxes.
Flexible Plastics
When printing, these plastics often require an ink without cracking after being bent or stretched, or undergo special technical treatments.
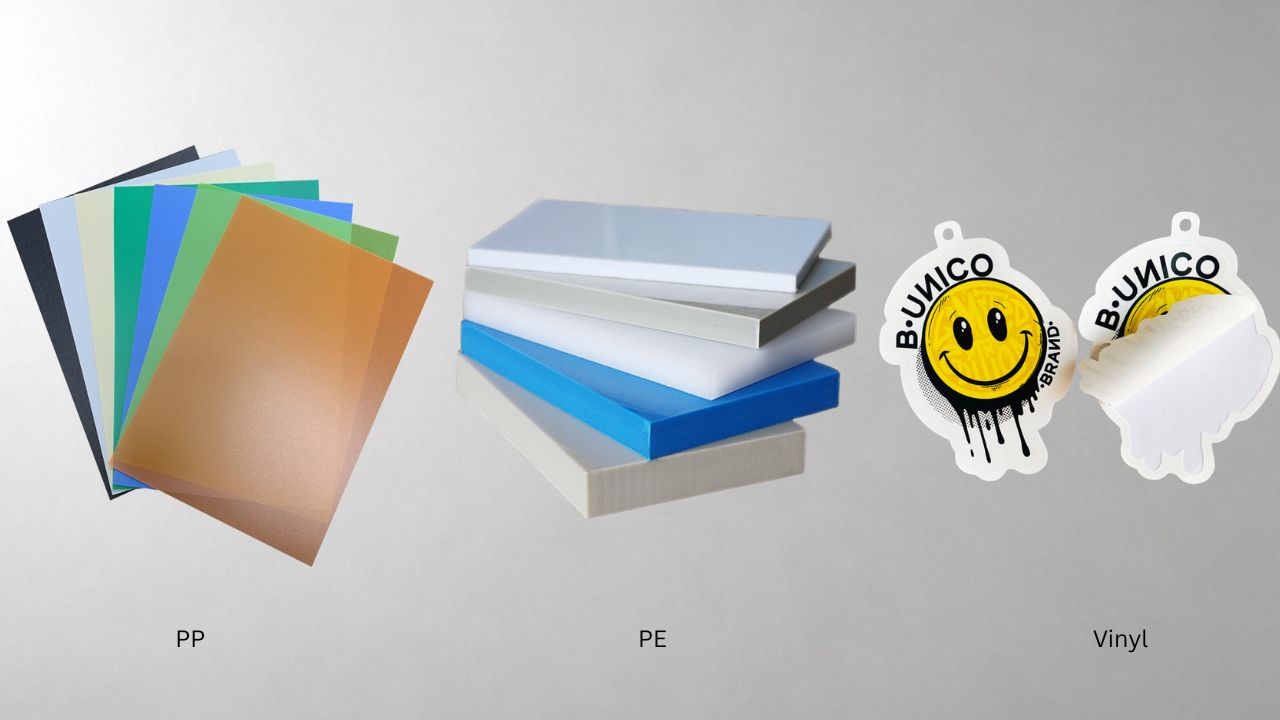
Polypropylene (PP)
PP and PP hollow boards feature lightweight, water resistance, and foldability, making them cost-effective choices for your outdoor temporary signs and turnover boxes.
A key technical detail to pay attention to in actual use—untreated PP is a low surface energy material. Once directly printed with ink, the ink will peel off easily. That means you should confirm that the board has undergone corona treatment to increase the surface tension to over 42 dynes/cm, so that UV ink or screen printing inks can adhere firmly.
Polyethylene (PE)
In sheet and packaging printing, PE encompasses two types of sheets: high-density HDPE and low-density LDPE. It is a fundamental polymer material in the fields of industrial packaging and signage.
As a typical non-polar plastic, PE has a relatively low surface energy, making direct ink adhesion difficult. Before printing, corona treatment or flame treatment increases the surface tension to over 40-42 dynes/cm.
Once treated, these processed PE sheets and films support UV-cured inks and flexographic inks well. They are widely used for your heavy-duty industrial bags, chemical container labels, food-grade packaging, and highly wear-resistant industrial baffles.
Vinyl
Vinyl is actually a flexible form of PVC—both are based on the same polyvinyl chloride—usually used for making flexible rolls or stickers, such as Self-adhesive vinyl (SAV).
It is one of the most widely used flexible substrates. Vinyl delivers excellent ink compatibility whether for vehicle wraps, window graphics, or banners. Without pretreatment, it is compatible with eco-solvent, latex, and UV inks.
Thanks to its advantages—extensibility, weather resistance, and residue-free removal—vinyl performs well for your commercial decals, car graphics, and outdoor signage projects.
Main Plastic Printing Methods and Step-by-Step Processes
Screen Printing on Plastic Sheets(Silkscreen)
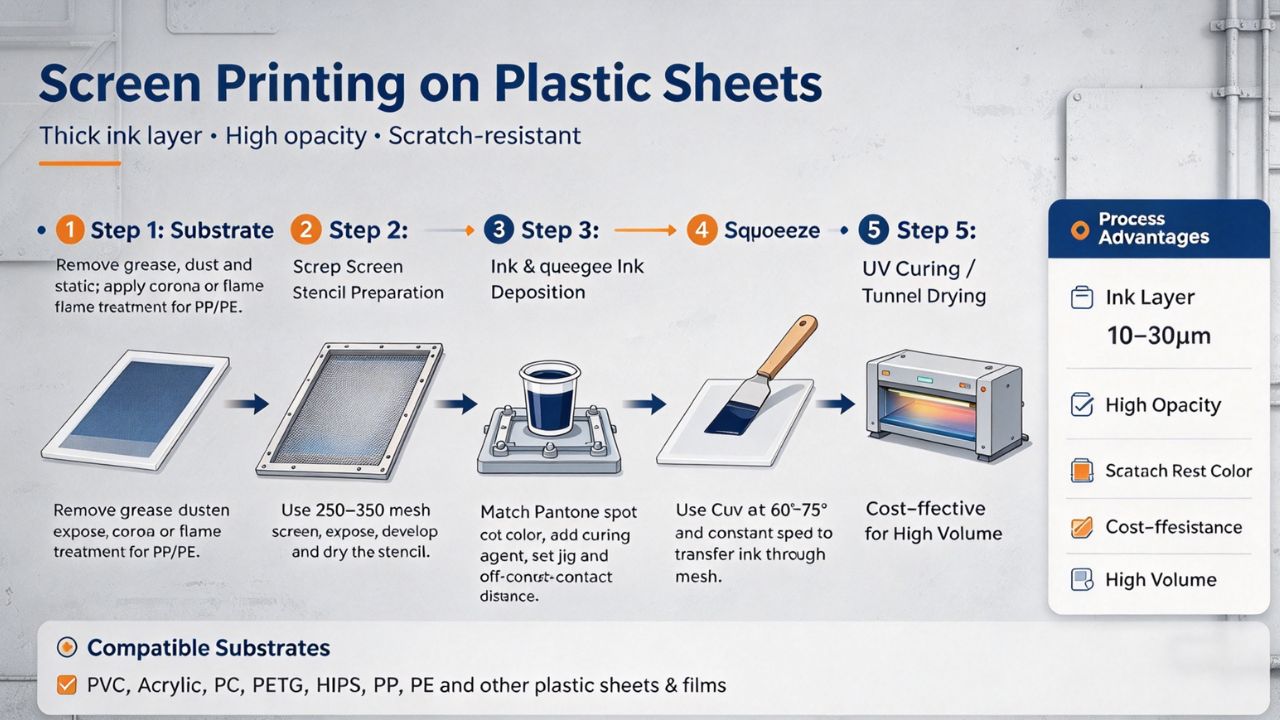
Screen printing works across diverse substrates—such as paper, plastic, metal, glass, wood, and even fabric—making it a practical choice for medium and high-volume output. Screen printing on plastic sheets leaves a heavy ink deposition. With an ink layer thickness of 10–30 microns, it delivers strong opacity. The printed spot color offers high saturation and strong scratch resistance.
While screen making and machine setup require initial costs, once running, high-volume runs drive down the unit cost. That said, if you need to print complex halftone gradient patterns, the alignment accuracy and efficiency of silkscreen can’t match digital direct printing.
Step-by-Step Processes
Step 1: Substrate Preparation
Remove grease, dust, and static electricity from the plastic sheet surfaces. Apply surface corona treatment or flame treatment to low surface energy materials, such as PP and PE, to ensure the standard surface tension.
Step 2: Screen Stencil Exposure & Preparation
Expose the design vector graphics onto photosensitive film on a screen plate with a specific mesh count (250-350 mesh). Develop and dry it to form a printing plate.
Step 3: Ink Preparation & Jig Setup
Mix the spot color ink according to the Pantone color code and add the curing agent. Fix the plastic parts on the dedicated positioning jig of the printing plate, then adjust the off-contact distance between the screen and the base material.
Step 4: Squeegee Ink Deposition Process
Pour in the ink and spread it with an ink return knife. Use a squeegee to push and scrape at a fixed angle (60°–75°) at a constant speed to force the ink through the mesh and transfer it to the plastic surface.
Step 5: UV Curing / Tunnel Drying Cycle
Depending on the ink type, pass the silkscreen plastic parts into the UV curing tunnel (instant curing) or the hot air drying tunnel.
Pad Printing on Plastic Sheets
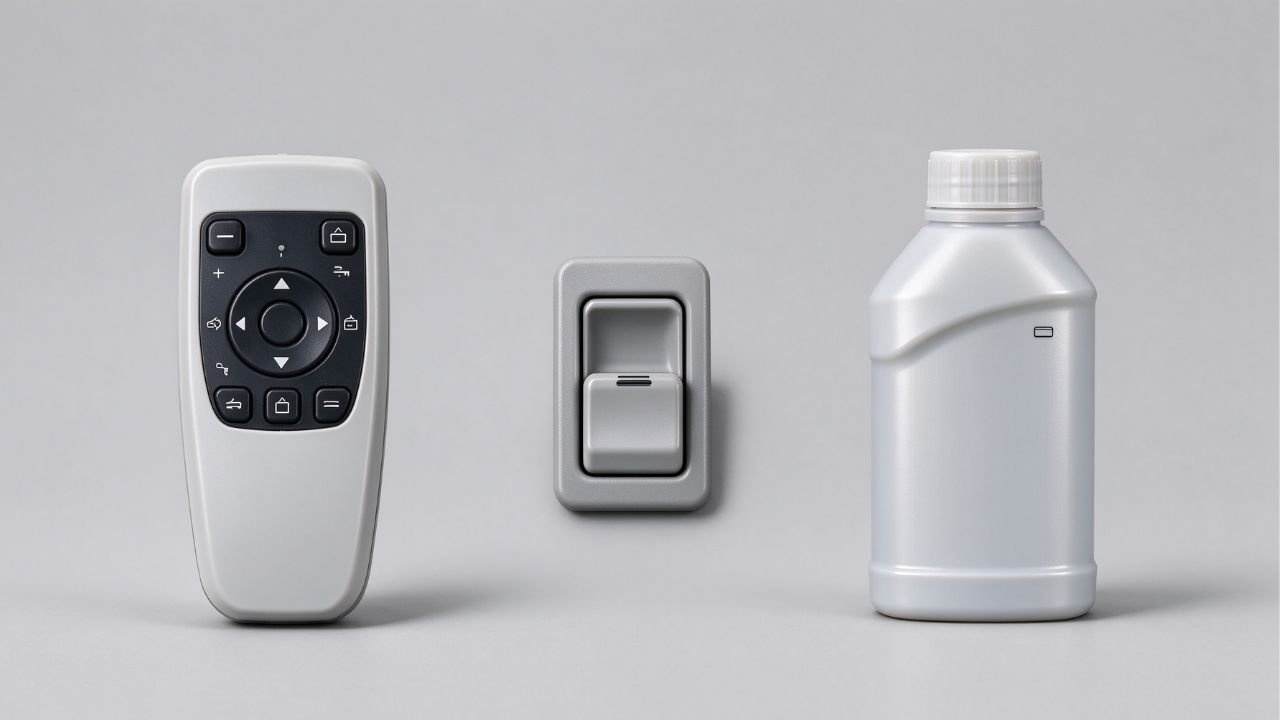
For processing plastic parts with uneven surfaces, curves, countersunk holes, or irregular structures, we go with pad printing. Pad printing on plastic picks up ink from the etched steel plate (cliché) using a specially made silicone pad and then transfers it to the surface of the parts like a stamp. This soft silicone pad features strong deformation ability, minimizing graphic distortion on complex 3D curved surfaces.
Pad printing plastic components offers a thinner ink layer than screen printing. If you need fine markings on small, non-flat areas such as medical device buttons, car switches, bottle caps, and remote control shells, pad printing is your most efficient option.
Step-by-Step Processes
Step 1:Cliché Etching & Pad Selection
Etch the graphics and text onto the cliché via laser or chemical etching, with the depth controlled at 20–30 microns. Select the appropriate hardness and shape of the silicone pad based on the curved surface geometry of the component
Step 2: Ink Cup Doctoring
Slide the sealed ink cup back and forth on the steel plate, applying the ink in the etched groove. Scrape off the remaining ink on the surface of the non-graphic area with its ceramic doctoring ring.
Step 3: Silicone Pad Ink Pickup
As solvent evaporation makes the ink tacky, press the silicone pad onto the cliché to pick up the ink film from the etched groove.
Step 4: Ink Transfer onto Contoured Surfaces
Press the silicone pad vertically down onto the plastic component, conforming to the irregular surface to completely release and transfer the ink.
Step 5: Solvent Evaporation and Ink Setting
After the remaining solvents evaporate, place the printed parts in an oven or allow them to cure naturally.
UV Printing on Plastic Sheets
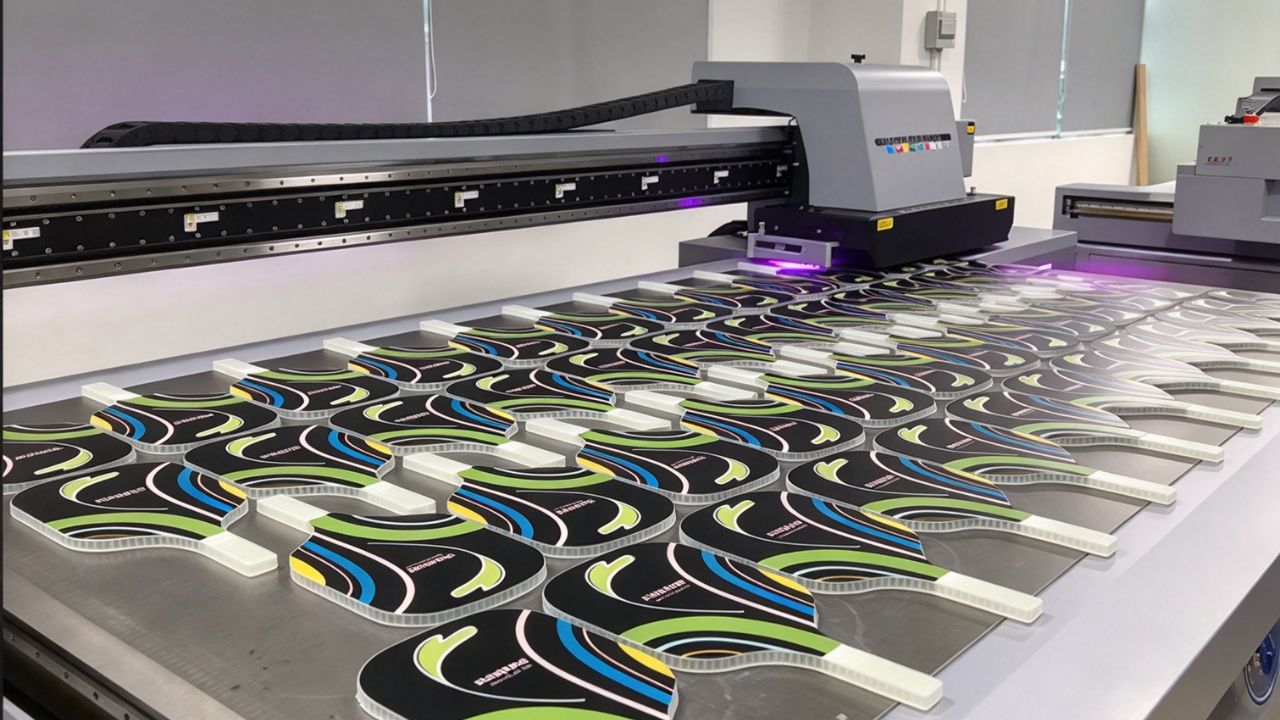
The greatest advantage of UV flatbed printing on plastic lies in plateless setup and instant curing. With a piezoelectric printhead, it directly sprays ink onto plastic surfaces and cures instantly with UV-LED lamps. The ink adheres directly to the surface, meaning UV printing can also create tactile 3D effects, not just simple flat prints.
If your project involves small-batch proofing or variable data, UV printing is your most cost-effective option. Digital UV printing on plastic sheets also works for high-precision gradient patterns. But based on our experience, consider the unit cost and delivery speed when handling high-volume orders of hundreds of thousands of pieces.
Step-by-Step Processes
Step 1: RIP Software Color Calibration
Import the vector graphics into RIP software (such as Onyx, Caldera), and set the color channels and resolution.
Step 2: Dust & Static Removal
Blow the plastic sheet with an ionizing air blower or wipe it with a lint-free cloth in combination with isopropyl alcohol (IPA). This prevents static electricity from attracting dust, causing ink stringing or overspray.
Step 3: Vacuum Positioning & Height Sensing
Place the sheets on the vacuum table and engage vacuum suction to fix the position. Use the automatic sensor to set the safe printhead gap relative to the sheet surface (usually 1.5–2.0 mm).
Step 4: Jetting & Synchronous UV Curing
Execute multi-pass drop-on-demand (DOD) inkjet printing. Simultaneously, run Instant UV LED ink curing located on both sides of the printhead.
Step 5: Post-Process & QC
Selectively spray protective varnish and perform a cross-hatch adhesion test by sampling after letting them cure for 24 hours.
IMD / IML
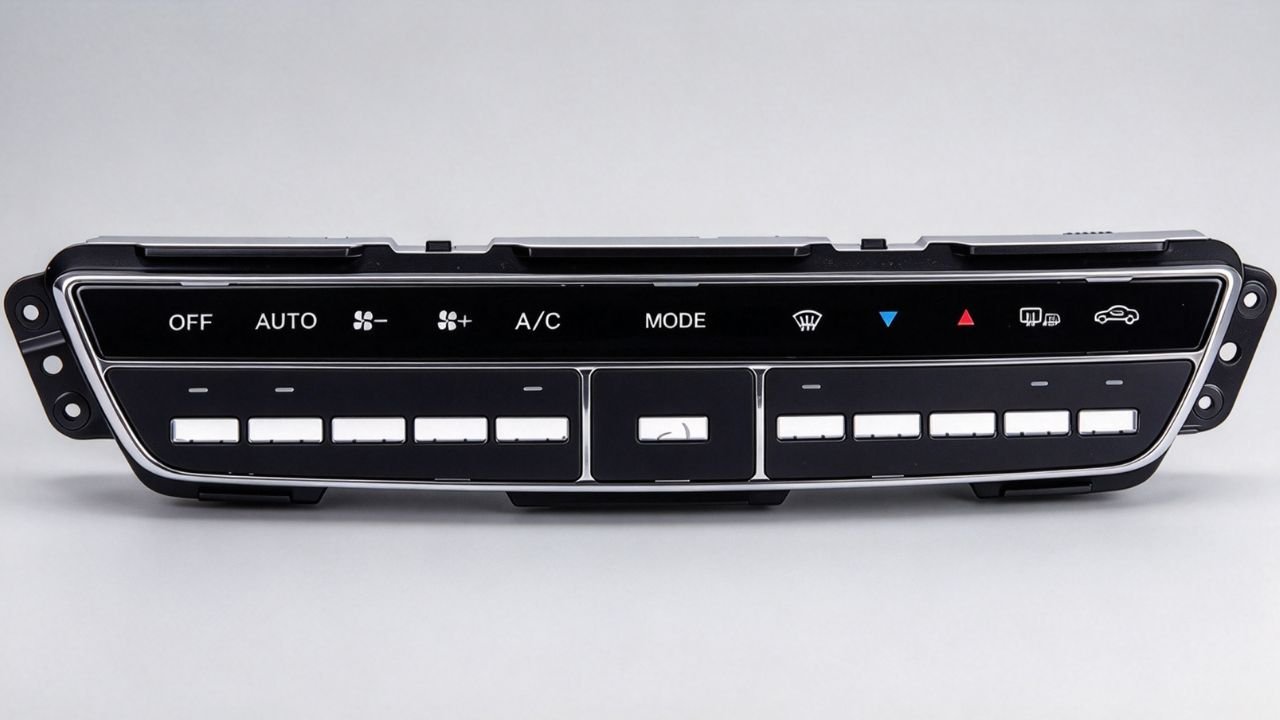
If ultimate durability of graphics and text is your top priority, we recommend you choose IMD/IML. In the IMD/IML process, place the thin plastic film (typically PC or PET) into the mold cavity before injection molding, fusing it integrally when the molten resin is injected.
In this way, the ink layer is directly sealed inside the plastic shell. This eliminates the possibility of subsequent ink peeling, and there is no need to worry at all about the performance of the finished product in terms of scratch resistance, chemical resistance, and water resistance.
This printing method requires the use of molds, so the upfront tooling cost is relatively high. Therefore, it is only suitable for mature plastic products with high production volume demands.
Step-by-Step Processes
Step 1: Subsurface Graphic Film Printing
Print high-precision graphics and adhesive layers behind the film by screen printing or gravure printing.
Step 2: Graphic Film Thermoforming & 3D Film Precision Die-Cutting
Heat and soften the printed film, then press it into a 3D shape fitting the cavity of the injection mold in a high-pressure gas forming machine. Subsequently, trim the excess edges and corners.
Step 3: Robotic Film Insertion
With robotic electrostatic adsorption or vacuum suction cups, place the formed film into the predetermined position of the mold cavity.
Step 4: Injection Mold Insertion and Bonding
After the mold is closed, inject high-temperature and high-pressure plastic melt (such as ABS, PC) behind the film. Integrate the melt with the adhesive layer of the film.
Step 5: Cooling & Demolding
After the mold cools down, open it and eject the finished product.
Heat Transfer & Hot Stamping on Plastic Substrates
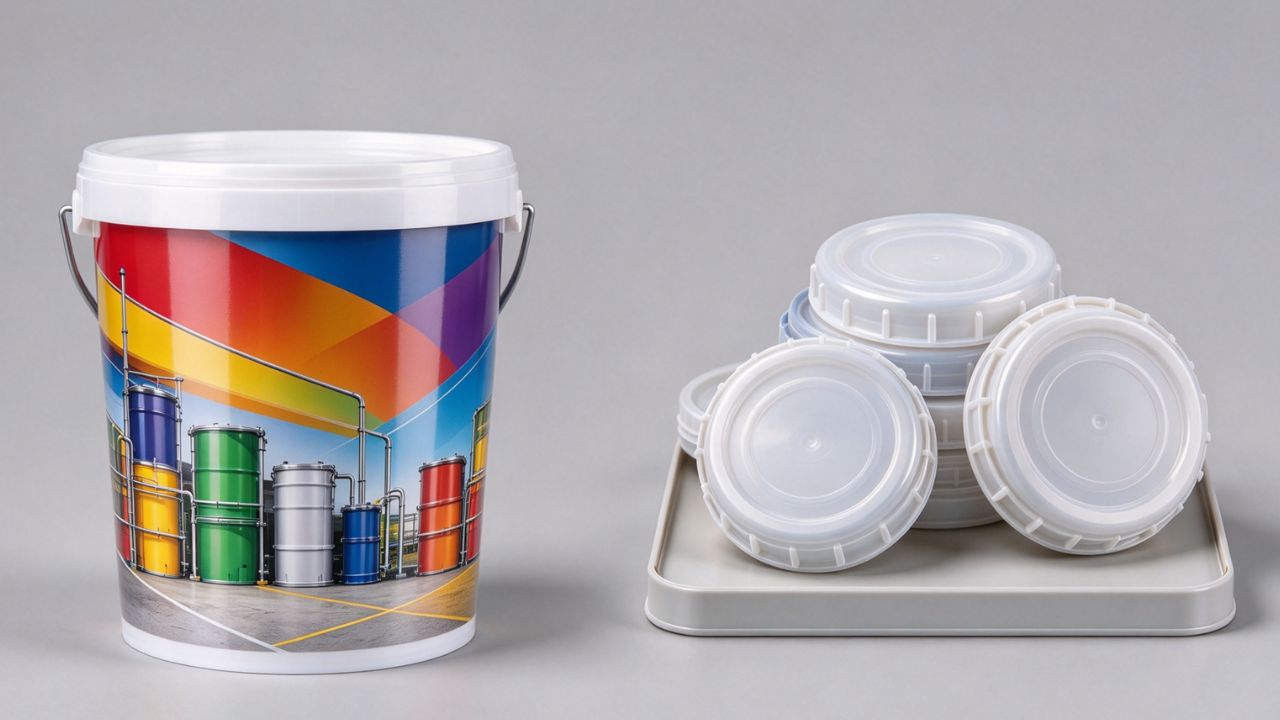
With heated silicone rollers or hot stamping heads, heat transfer printing can transfer multi-color patterns or metal foils from a carrier film to plastic parts instantly under a certain temperature and pressure.
Just through a single pass, heat transfer printing on plastic delivers multi-color patterns. It performs well in large-area multi-color printing and hot stamping processing. Without additional waiting time, once printed, it can be directly taken off the production line for packaging.
During actual printing, a common concern is adjusting the temperature and dwell time to avoid structural deformation of the thin-walled plastic parts due to heat.
Step-by-Step Processes
Step 1: Transfer Film Setup
Select the pre-printed transfer film rolls and load them onto the film supply shaft of the heat transfer machine.
Step 2: Part Alignment
Fix the plastic parts to be printed (such as bucket bodies, bottle caps) on the automated fixture or rotating base. Ensure uniform force distribution in the imprinting area.
Step 3: Heated Silicone Roller / Die pressing
Heat the silicone rubber roller or hot stamping head to 150°C-220°C. Press the transfer film to melt the hot melt adhesive layer and bond it to the plastic surface.
Step 4: PET Carrier Film Peeling
When the transfer head is lifted, the PET carrier base film is automatically peeled off by the reel, leaving the graphic layer on the surface of the plastic part.
Step 5: Cooling & Solidification
The hot melt adhesive cools and solidifies within seconds, completing the adhesion.
Laser Marking on Plastic Sheets
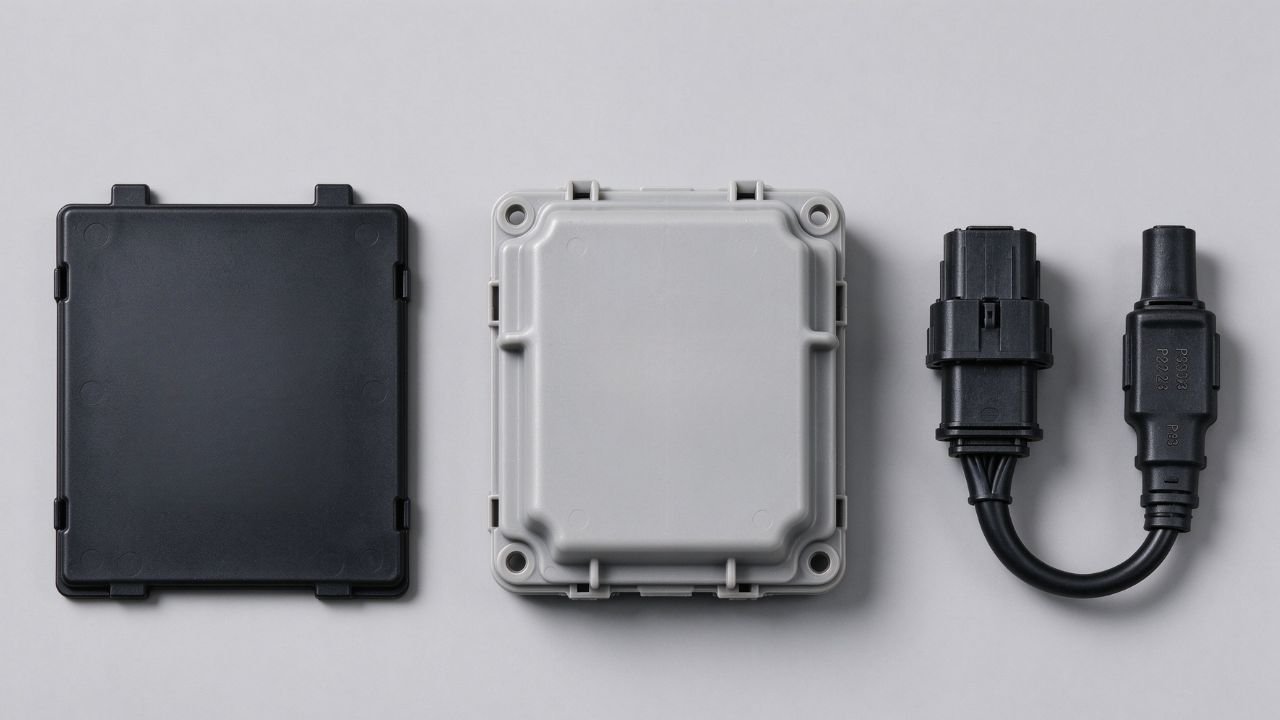
Laser marking plastic parts is a non-contact process. Relying on fiber or CO₂ laser beams, it triggers carbonization or foaming. Limited by the reaction of plastic resin to laser wavelengths, laser marking usually only prints contrasting colors, such as black, white, and gray. We recommend UV flatbed printing instead for full-color printing performance demands.
Without inks or solvents, the plastic laser marking process can print permanently indelible patterns. This meets the standards for your traceability QR codes and serial numbers for medical devices and automotive parts.
Step-by-Step Processes
Step 1: Vector Graphic File Rendering
Import DXF/AI vector graphics into the laser control software.
Step 2: Laser Power and Focal Length Calibration
Adjust the lifting shaft to ensure the laser focal point accurately lands on the plastic surface. Based on the material of the plastic resin, set the power, frequency, and scanning speed of the fiber, CO₂, or UV laser.
Step 3: Part Loading
Place the plastic parts in the workbench fixture, then focus and preview the marking area with a red light pointer.
Step 4: Surface Carbonization / Foaming Reaction
Run high-speed scanning with a high-energy-density laser beam. The additives on the plastic surface foam, carbonize, and change color or undergo physical etching, revealing clear, high-contrast graphics.
Step 5: Permanent Mark Contrast Verification
The exhaust system sucks away the trace amount of smoke and dust. If the marked graphic is a QR code or barcode, test its readability with a barcode scanner.
Hydrographics on Plastic Sheets
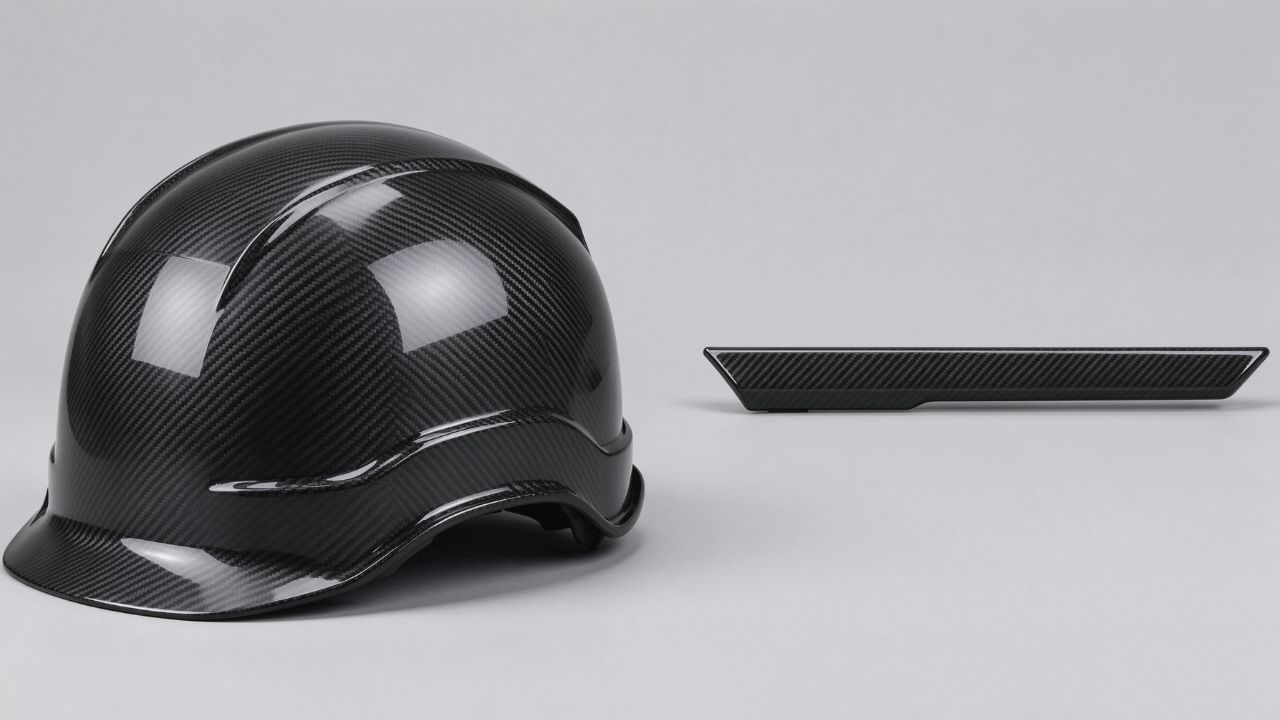
For complex 3D irregular parts such as car trim and helmets that require a perfect 360-degree fit, we usually recommend hydro dipping for plastic parts.
Float a film printed with carbon fiber or wood grain textures on water, dissolve it with an activator, and then immerse the plastic part in the water. The pattern adheres to the part under water pressure. It is a challenging process to achieve manually, involving primer application, soaking, washing, drying, and clear coating.
Step-by-Step Processes
Step 1: Base Coat Paint Spraying
After cleaning and degreasing the surface, spray the special plastic-bonded basecoat on the plastic parts and dry it. This primer layer improves ink adhesion on plastic surfaces.
Step 2: PVA Film Floating on Water Bath
Lay the PVA water-soluble film printed with patterns flat in warm water at 27°C–32°C.
Step 3: Chemical Activator Spraying
Evenly spray the activator on the film surface to dissolve and liquefy the solid film into a liquid ink layer floating on the water surface.
Step 4: Dip Immersion
Hold the plastic part and immerse it uniformly into the water tank at a 30° to 45° angle. Water pressure helps to evenly coat the floating ink on the three-dimensional curved surface of the part.
Step 5: Rinsing, Drying & Clear Topcoat
Rinse off the PVA gel residue on the surface of the parts in the washing machine. After drying, spray a PU or UV clear coat. Then bake it at high temperature to provide ultimate scratch and weather resistance protection.
How to Select the Best Printing Method for Your Project
When choosing the most suitable printing method for your project, the key lies in balancing part geometry, visual effects, order volume, and functional durability requirements.
| Process | Geometry Fit | Graphic & Color Capability | Consumables | Durability Level | Primary Applications |
| Screen Printing | Large Flat Plastic Sheets | High-opacity spot colors & solid coverage | Liquid inks + solvents/UV curing | Moderate to High | Nameplates, control panels, display boards |
| Pad Printing | Small, contoured, or recessed surfaces | 1-4 spot colors, fine text & logos | Pad inks + silicone pad + solvents | Moderate (subject to wear) | Buttons, toys, medical devices, cap sides |
| UV Printing | Flat to mild curves; No plates needed (On-demand) | Full-color, photo-grade & 3D tactile textures | UV-curable inks | Moderate to High | Prototyping, low-volume custom housings |
| IMD / IML | Complex 3D shapes, in-mold integrated parts | High-res full-color, embedded graphics | Composite film + injection resin | Ultimate (Scratch & chemical resistant) | Automotive dashboards, home appliances, phone cases |
| Heat Transfer & Hot Stamping | Flat, cylindrical, or tapered shapes | Full-color artwork / Metallic foil shine | Pre-printed PET film / Stamping foils | High (Thermal bond layer) | Plastic buckets, cosmetic bottles, caps |
| Laser Marking | Flat to mildly curved (Non-contact) | Single contrast color (No full color) | Zero consumables (Ink-free) | Permanent (Resin carbonization) | Medical QR codes, automotive components, serials |
| Hydrographics | Complex 3D irregular parts (360° wrap) | Unlimited full-color, realistic textures | PVA film + activator + clear coat | High (Protective topcoat) | Car interior trims, helmets, sports gear |
FAQ
How to Print Permanently on Plastic?
In industrial manufacturing, the effect of permanent preservation can usually be achieved through pretreatment, UV curing, and a subsequent coat of clear varnish. Before printing, increasing the surface tension of the plastic sheet to over 38–40 dynes/cm through corona treatment, flame treatment, or application of a special substrate primer will significantly improve ink adhesion.
UV ultraviolet curing ink is adopted. The ink undergoes high-molecular cross-linking the moment it is exposed to UV light, forming a physically hardened film with the plastic surface. After printing, applying a PU or UV protective varnish followed by high-temperature baking completely seals the ink layer—providing superior scratch resistance, UV weatherability, and chemical corrosion resistance.
How Do You Test Ink Adhesion Strength on Plastic Sheets After Printing?
We recommend performing a standard Cross-Hatch Tape Test (ASTM D3359 / ISO 2409). Cut a lattice pattern into the cured ink film, apply pressure-sensitive tape (e.g., 3M 610), snap it off at a 90° angle, and inspect for flaking. A passing grade for commercial signage is 4B or 5B.
Can a Normal Printer Print on Plastic?
No, ordinary office printers—whether inkjet or laser—cannot print on plastic.
Plastic surfaces have no water-absorbing micro-pores. When standard water-based ink is sprayed onto a plastic sheet, it beads up and sags instead of drying, and cannot coalesce into patterns. The fuser roller inside a laser printer reaches 180°C to 200° C. When conventional plastic sheets are printed, they will deform and melt, and may even jam the core and damage the equipment.
What Kind of Ink Sticks to Plastic?
Conventional water-based inks cannot adhere to the surface of plastics. Industrial inks specially formulated for high-molecular polymers must be used.
UV-curable inks and solvent-based inks are the primary industry standards on the market. Mixed with a curing agent, these inks deliver exceptional chemical and abrasion resistance, making them ideal for control panels that must withstand friction, diesel, or alcohol flushing.
How to Remove Print on Plastic?
To remove printing marks on plastic, it is necessary to dissolve the ink without damaging the base material itself.
For hard-coated sheets like scratch-resistant acrylic or PC, you can wet-sand the surface using 2000-grit or finer wet sandpaper, or perform low-pressure sandblasting using fine sodium bicarbonate (baking soda) particles—followed by buffing and polishing to restore optical clarity.
What Type of Protective Film Do You Supply?
We offer two types of industrial-grade protective films for customers to choose from according to your needs.
- PE Protective Film: Made with imported low/medium-tack pure PE film and non-transfer pressure-sensitive adhesive, it peels off smoothly without tearing. This guarantees Zero Adhesive Residue on the sheet surface, avoiding any contamination of UV printheads.
- Kraft Paper Masking: Made of high-toughness, moisture-proof kraft paper, it is specially designed for sheets that require CNC engraving, laser cutting, or heavy-duty scratch protection. The paper film has exceptional flatness without edge lifting or curling during cutting, while also offering an excellent anti-static effect.
In addition, we can provide anti-static PE film for printing customers to prevent the generation of static discharge upon film removal, eliminating dust attraction from the air.
Can the Printing Process Withstand High-Temperature Post-Processing?
Sure, provided that the appropriate substrate and ink are selected.
If the sheet needs to be heated to 140°C – 180°C for hot stretching and baking after printing, you must use specialized flexible UV inks or thermoforming screen printing inks. This type of ink has an elongation rate of up to 200% to 300%. When stretched and bent, the ink layer will deform synchronously with the sheet, without cracking, peeling, pattern fading, or graphic distortion.
Our plastic sheets are produced from 100% virgin resin and fully annealed to relieve internal stress. During the high-temperature thermoforming process, this prevents abnormal substrate shrinkage that could otherwise stretch or tear your printed graphics.
Final Thought
No single type of plastic sheet can meet all printing and manufacturing requirements. Zoycen matches the right printing method and precision fabrication to your plastic sheets, ensuring vibrant color performance and permanent print durability for your final products.